Third Party Plugins
provides a range of ready plugins for third party integration.
- Login to your prestashop Admin panel
- From left side navigation bar go to, "Modules and Services" (Figure 1)

- Now click on "Add a new module" button on the top-right side of the page (Figure 2)

- Then, click on "Choose a file" button from the Add a new module screen and select "paymentprestashop.zip" file (Figure 3)

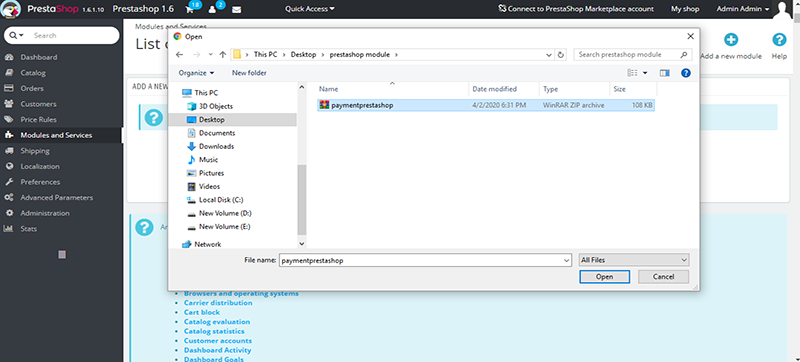
- Click on "Upload this module" button to upload the module to your shop.
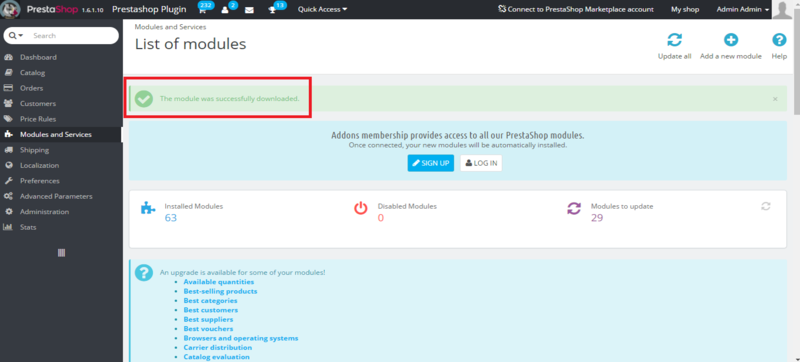
- Once the module is successfully uploaded, you will receive Success message on top of the screen.
- You can find the paymentprestashop module in "Payments and Gateways" tab in module list.
- Search for the plugin name "paymentprestashop" in the module list search bar.
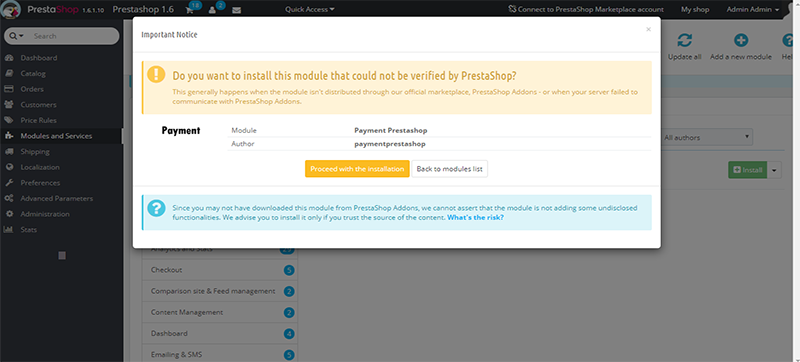
- Click on "Install" button seen on the right hand side of the paymentprestashop module. Than a dialogue box will open asking to proceed with installation. Click on proceed installation button and complete the installation.

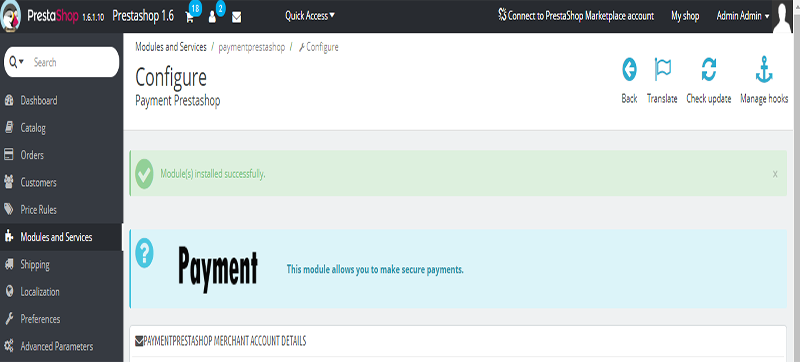
- To start using the paymentprestashop module you first have to configure the module. For that,Click on "Configure" button, where "Install" button was first seen.
- A new configuration page opens where you need to enter all details regarding your merchant account.
- Following is a briefs about all the details to be filled in the configuration page of paymentprestashop module :-
i) Merchant Type Details:-

ii) Click save to save the configuration.
iii) Now your paymentprestashop module is configured and hooked in your prestashop payments to receive payments using Gateway.
- Now, Go to your front office to see the Payment Method on checkout page. Select the product and click on add to cart.

- Click on the "Proceed to checkout" button as shown in the below screenshot.

- Again click on the "Proceed to checkout" button to proceed further.

- Click on the checkbox to agree the terms & conditions as shown in the screenshot and then click on the "Proceed to checkout" button.

- Now, click on the "CHECKOUT" button to proceed to the Gateway Server.

- Select the Payment Information.

- Fill all the details.

- Congratulation! Your order was successfully placed.

- Extract the zipped "cms-magento" and you will find the following folders as shown in the below screenshot

Paste the above two folders into the root folder of magento as shown in the screenshot

Log into magento admin panel and go to System=>Configuration=>Payment Methods and find the name of the plugin and configure the plugin as provided by payment gateway and click to save. See the below screenshot for reference. [Make sure that Cache Storage Management is disabled if not, go to System=>cache management, select all checkbox on left side and from Actions dropdown select disable on right side and click submit button.]

Now you can check the Payment Method on Magento Website [front end page] by adding product to cart as shown in below screenshot

On checkout page you will see the payment gateway method as shown in the below screenshot

Now, you will be redirected to "" Gateway Server as shown in the below screenshot


- Congratulation! Your order was successfully placed.

- In root/app create a folder with name 'code' and paste the folder CmsmagentoPayment in it.

- Goto Admin->Stores->Order Status and click on Create New Status

- Enter Status Code as 'failed' and Status Label as 'Failed' and click on Save Status button

- Open the root directry of the project in command prompt and run below commands
i) php bin/magento module:enable CmsmagentoPayment_Cmsmagento
ii) php bin/magento setup:upgrade

- Go to Admin->Store->Configuration->Sales->Payment Method->Cms magento, fill the details here and save them.

- Open the root directry of the project in command prompt and run below command
i) php bin/magento setup:upgrade

Now, go to your website and add a product to your cart and fill the checkout page

On checkout page you will get to see " Method" as shown in the below screenshot. Click on that method and continue.

You will get to see page like shown in the below screenshot, select your payment method.

Fill all payment details.

You will see a page like this if transaction is successful

- You will be directed to the merchants website. And a successful message will be displayed

- Login to your WordPress Admin panel
- On the side menu bar, click on "Plugins" tab.

- Now in the "Plugins" screen, click on "Add New" button

- In the add plugin page, click on "Upload Plugin" button.

- Now click on "Choose File" button.

- After clicking on a "Choose File" button, a small search dialog box will be displayed, now search for the zip file (plugin provided by as pz-woocommerce) and the click on "Open".

- Once the plugin is installed, click on "Activate Plugin" button.

- After activating the plugin, the following screen will be displayed (Figure 7). Click the "WooCommerce -> Settings" link from the left side navigation panel.

- Now click on "Checkout" tab on the top.

- In the checkout page, scroll to the bottom. You will see the following screen (Figure 9). Click on the "pz-woocommerce" link.

- In the following page (Figure 10), please tick on "Enable pz-woocommerce Payment Module" link. Also fill all the technical details received from and click on "Save Changes" on the bottom of the page (Figure 11).


- Congratulation, your plugin has been installed successfully. Please visit your site and you will see "pz-woocommerce" as Payment Method.
- Now, lets see how the transaction processing flow will be for your customers.
- Step1: When a customer visit your site on your product purchase page like below:

- Step2: If a customer select some products and then if he click on "PROCEED TO CHECKOUT", then he will see "" as payment option or payment method in list of your existing payment option like given below (Figure 13).

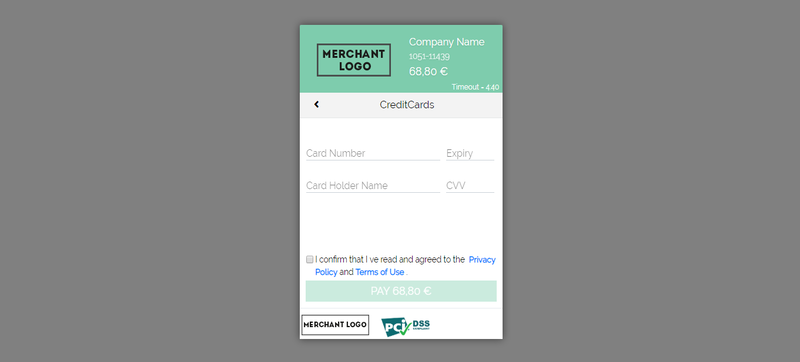
- Step3: And finally if a customer select "" as payment method and click on "PLACE ORDER", your customer will be redirected to the "" hosted payment page like below (Figure 14) where customer will fill the card details info and when the payment is done, the customer will be redirected to your online shop.

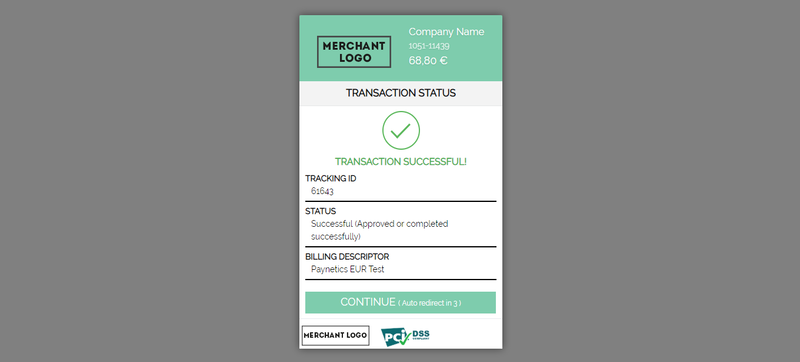
- Congratulation! Your order was successfully placed.

- Login to your WordPress Admin panel
- On the side menu bar, click on "Plugins" tab.
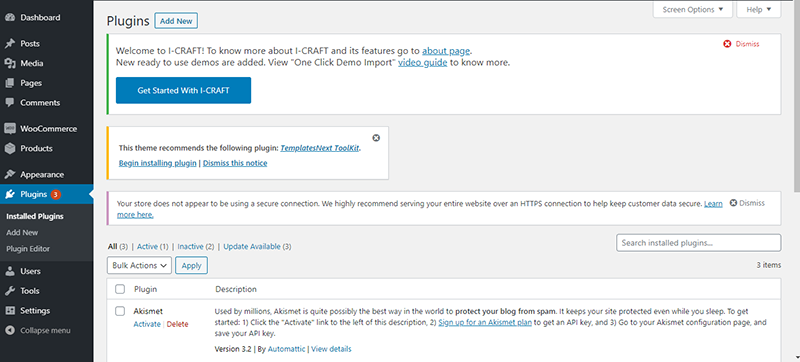
- Now in the "Plugins" screen, click on "Add New" button
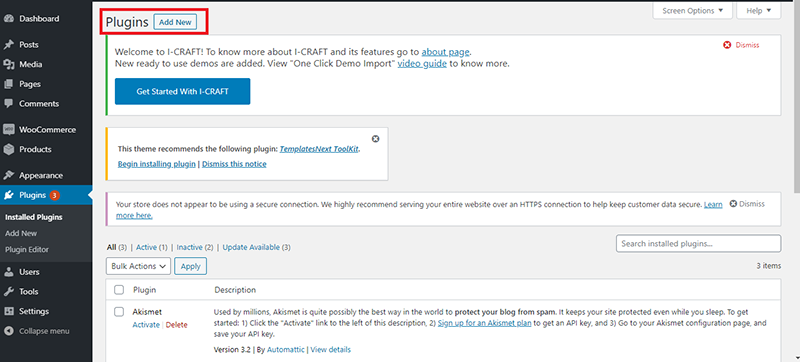
- In the add plugin page, click on "Upload Plugin" button.
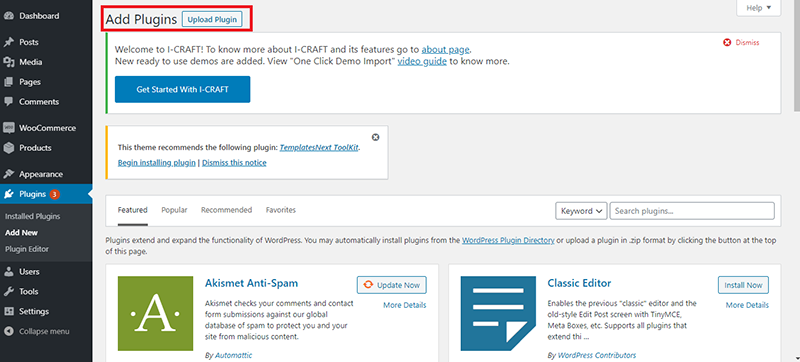
- Now click on "Choose File" button.
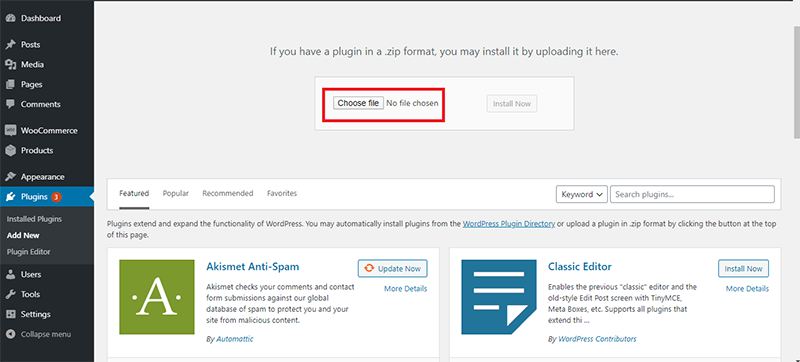
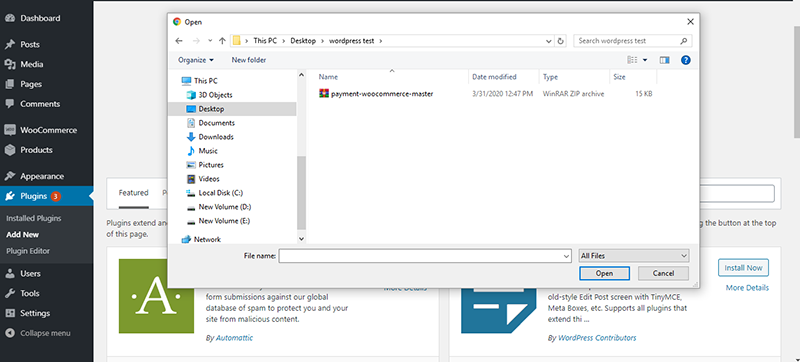
- After clicking on a "Choose File" button, a small search dialog box will be displayed, now search for the zip file (plugin provided by as payment-woocommerce-master) and the click on "Open".
- Once the plugin is installed, click on "Activate Plugin" button.
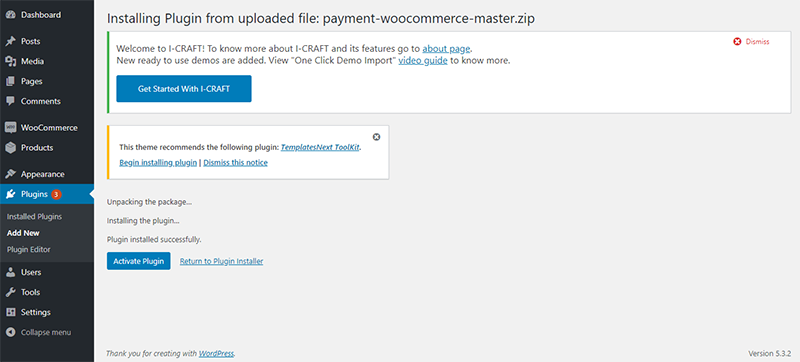
- After activating the plugin, the following screen will be displayed (Figure 7). Click the "WooCommerce -> Settings" link from the left side navigation panel.
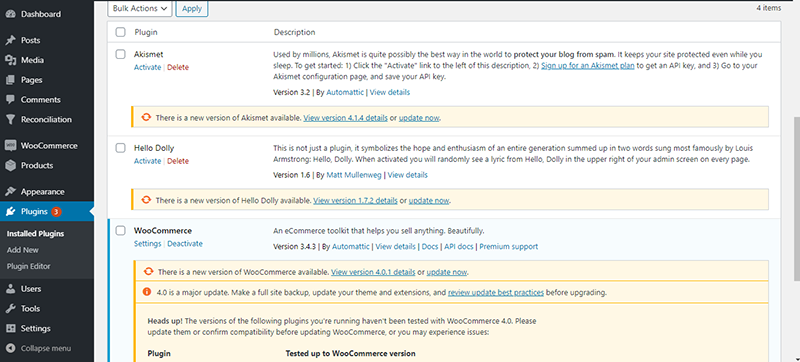
- Now click on "Payments" tab on the top.
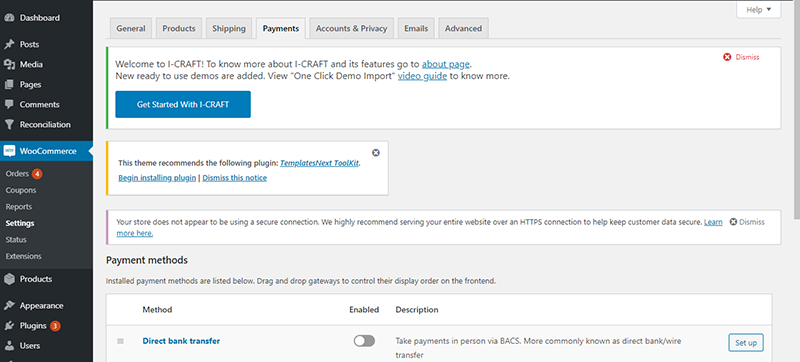
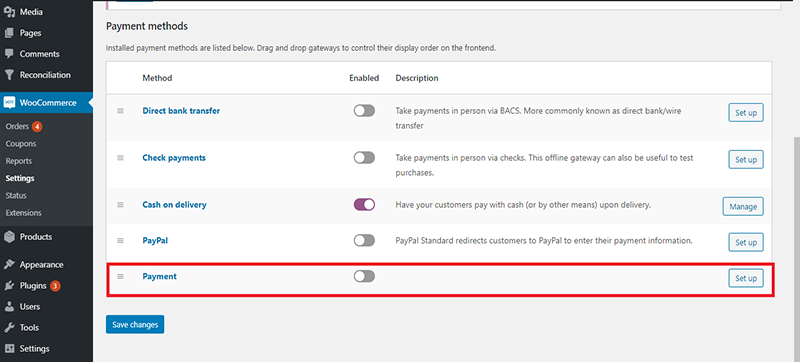
- In the checkout page, scroll to the bottom. You will see the following screen (Figure 9). Click on the "payment" link.
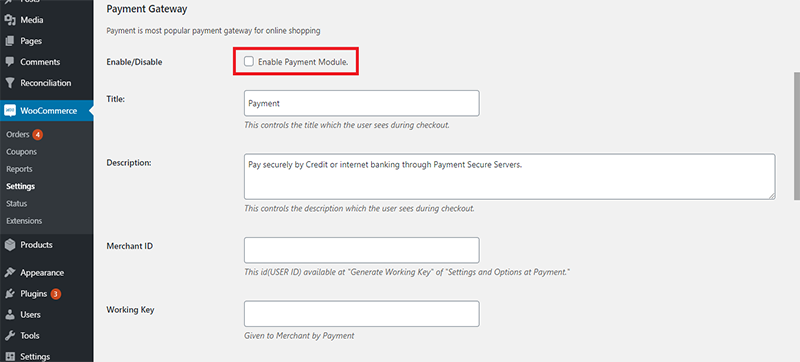
- In the following page (Figure 10), please tick on "Enable Payment Module" link. Also fill all the technical details received from and click on "Save Changes" on the bottom of the page (Figure 11).
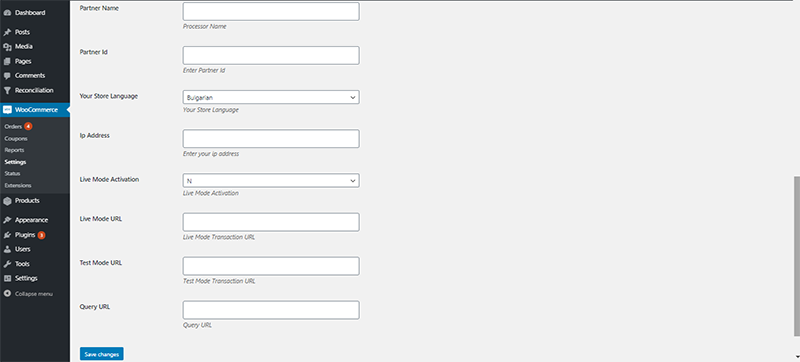
- Congratulation, your plugin has been installed successfully. Please visit your site and you will see "Payment Module" as Payment Method.
- Now, lets see how the transaction processing flow will be for your customers.
- Step1: When a customer visit your site on your product purchase page like below:
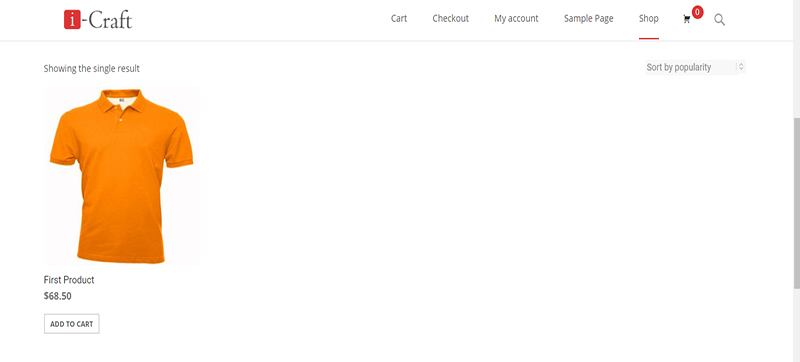
- Step2: If a customer select some products and then if he click on "PROCEED TO CHECKOUT", then he will see "" as payment option or payment method in list of your existing payment option like given below (Figure 13).
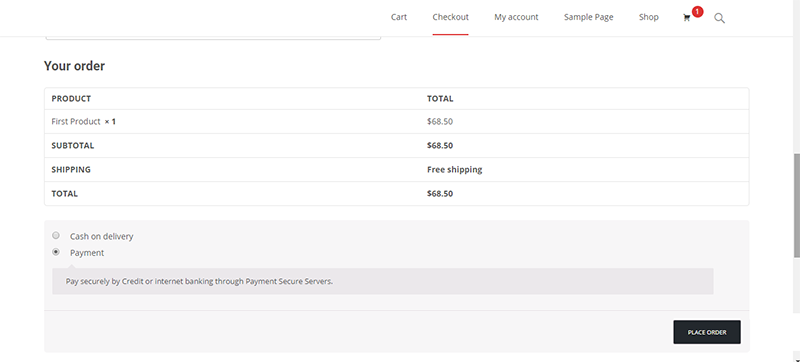
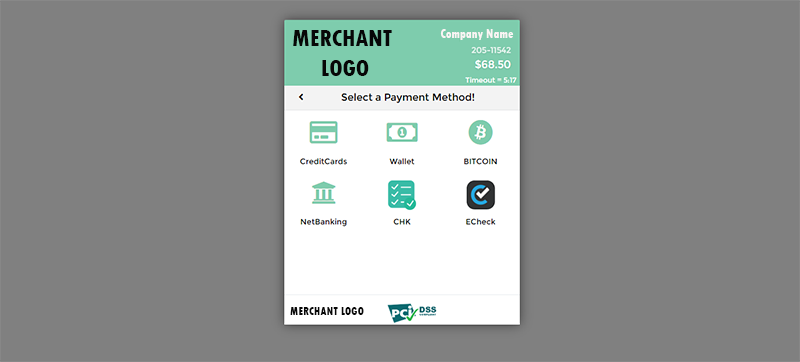
- Step3: And finally if a customer select "" as payment method and click on "PLACE ORDER", your customer will be redirected to the "" hosted payment page like below (Figure 14) where customer will fill the card details info and when the payment is done, the customer will be redirected to your online shop.
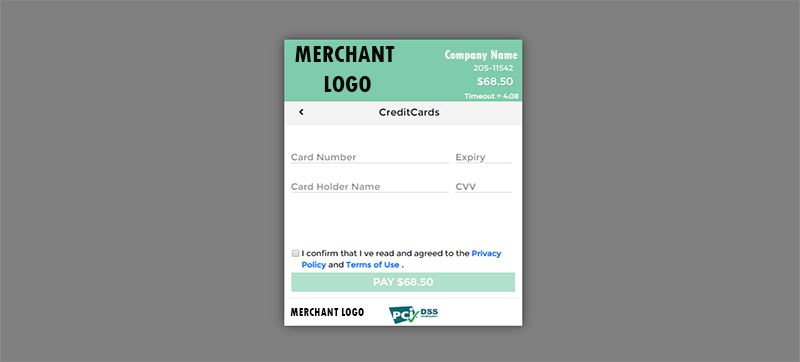
- Congratulation! Your order was successfully placed.
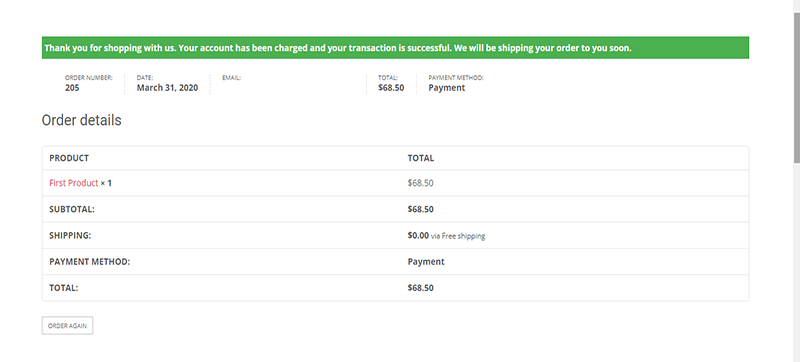
Please log into Drupal admin panel, you will see page similar like below and then click on the "Modules" tab

Now, click on the “install new module” as shown in the screenshot below.

Download the "cms-drupal" plugin and "commerce_custom_order_status" plugin. Browse both the downloaded modules one by one and install it. See the screenshot for your reference

Once you browse the "cms-drupal" Payment gateway you will see like below screen

Once you installed the "cms-drupal" plugin you will receive successfully message as shown in the below screenshot

Now in Commerce (CONTRIB) section find "cms-drupal" and commerce_custom_order_status and click on the checkbox and Save it.

Click on the "Store" button in the navigation bar and then click on the "Configuration" Link.

After you click on the "Configuration" link, the following page (Figure 8) will be displayed. In that page click on "Order settings" link.

Click on the "Add Order Status" button.

After that, fill the Title as 'Failed', Order State as 'Canceled' and check the enable box and click on save. Use the below screenshot as refence.

Again goto Store => Configuration => Payment Methods. In "Payment methods" page, go to "Disabled payment method rules" and find "Pay securely with Cms Payment Gateway" link and click on "enable".

Now, in "Enabled payment method rules", you will see "Pay securely with Cms Payment Gateway", click on the link.

In "Actions" section, you will see "Enable payment method: Pay securely with Cms Payment Gateway", click on the link.

Fill up the configuration settings as provided to you by and click on "Save" button.
Note: Goto "commerce_cms.module" file in sites/all/modules/drupal_v7.54-master on line 97 and change the display_title 'Cms Drupal' to any title of your choice. [$display_title = t('title_of_your_choice');]
Now , you can see method on Front end side as shown in the below screenshot.

- On checkout, our standard payment page will be displayed as given in the images below


- Below image will be displayed when your order is successfully placed.

Go to your opencart root folder and paste the “admin” and “catalog” folder in your root directory, which is provided to you from provider. See the screenshot for your reference

Now, login to your Opencart admin panel, you will see like below screenshot

Now in menu bar goto Extensions=>Payments, now you will get to see screenshot like below. Locate the “CMS Opencart Online Payment” and click on “install” link/button

After installing you need to click on “Edit” link/button to configure the CMS Opencart gateway settings. See the below screenshot for your reference

Fill all the details provided to you by gateway and make sure “Status is Enabled” to show the payment gateway on checkout page. Put the order status of your choice when the transaction is completed, failed and canceled and finally click on save button to save the settings.

Now goto your opencart website to check if method is working or not. To check, add product to your cart, as shown in the below screenshots

Fill the billing details and click on the continue button.

Now, choose “CMS Method” for your transaction and accept Terms and conditions and click on the continue button. As shown in the below screenshot

Now, click on the “Confirm Order” button and you will be redirected to gateway server for making transaction. See the below screenshot for your reference

Now you will get to see page like below screenshot, select your card type.

Now, Fill the card details and click on pay button to proceed further.

As soon as you click on the continue button you will be redirected back to the merchant website and you get to see success or failed or canceled message depending upon your transaction. See the below screenshot for your reference.

After redirecting back to Merchant’s website, you will get to see page like below screenshot

Go to your opencart root folder and paste the “admin” and “catalog” folder in your root directory, which is provided to you from provider. See the screenshot for your reference

Now, login to your Opencart admin panel, you will see like below screenshot

Now in menu bar goto Extensions=>Payments, now you will get to see screenshot like below. Locate the “Cms Opencart Online Payment” and click on “install” link/button

After installing you need to click on “Edit” link/button to configure the Cms Opencart gateway settings. See the below screenshot for your reference


Fill all the details provided to you by gateway and make sure “Status is Enabled” to show the payment gateway on checkout page. Put the order status of your choice when the transaction is completed, failed, canceled and finally click on save button to save the settings. Note: Title = “”, Description = “Pay securely via ”

Now goto your opencart website to check if method is working or not. To check, add product to your cart, as shown in the below screenshots

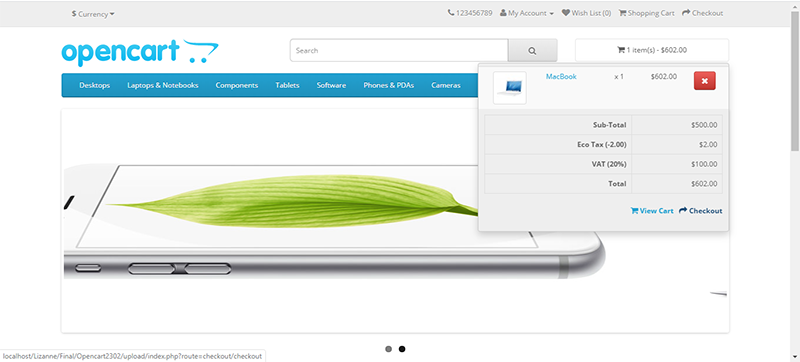
Fill the billing details and click on the continue button.

Now, choose “ Method” for your transaction and accept Terms and conditions and click on the continue button. As shown in the below screenshot

Now, click on the “Confirm Order” button and you will be redirected to gateway server for making transaction. See the below screenshot for your reference

Now you will get to see page like below screenshot, select your card type.

Now, Fill the card details and click on pay button to proceed further.

After redirecting back to Merchant’s website, you will get to see page like below screenshot

Go to your opencart root folder and paste the “admin” and “catalog” folder in your root directory, which is provided to you from provider. See the screenshot for your reference

Now, login to your Opencart admin panel, you will see like below screenshot

Now in menu bar goto Extensions=>Payments, now you will get to see screenshot like below. Locate the “CMSOpencart” and click on “install” link/button

After installing you need to click on “Edit” link/button to configure the CMSOpencart gateway settings. See the below screenshot for your reference


Fill all the details provided to you by gateway and make sure “Status is Enabled” to show the payment gateway on checkout page. Select success order to "Complete" Failed order to "Failed" & for cancel order to "Canceled" and finally click on save button to save the settings.

Now goto your opencart website to check if method is working or not. To check, add product to your cart, as shown in the below screenshots


Fill the billing details and click on the continue button.

Now, choose “ Method” for your transaction and accept Terms and conditions and click on the continue button. As shown in the below screenshot

Now, click on the “Confirm Order” button and you will be redirected to gateway server for making transaction. See the below screenshot for your reference

Now you will get to see page like below screenshot, select your card type.

Now, Fill the card details and click on pay button to proceed further.

After redirecting back to Merchant’s website, you will get to see page like below screenshot

Goto your ZenCart root directory and paste the “includes” folder in it [Unzip the CMS Zencart Plugin and you will find “includes” folder paste it in the root directory of ZenCart].

Now, login to your ZenCart admin panel and you will get to see like below screenshot.

Goto Localization->Orders Status and click on insert button. Enter "Completed" and press insert.
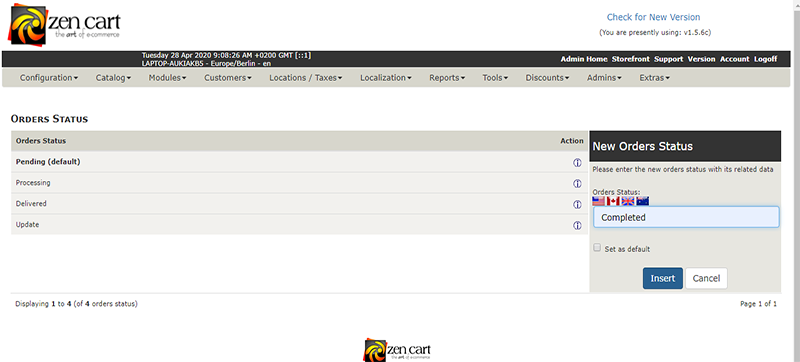
Goto tab Modules=>Payment and locate CMS Zencart as shown in the below screenshot, Now click install button to install CMS Zencart Online Payment.

Fill all the details given by provider. [Note: Set Order Status- set the order status of your choice when transaction is successful ] and click on Update button.

Now goto your zencart website [Front End] to check CMS Zencart Method on CheckOut page.

Click on checkout button to continue.

Login into or create new account to proceed further.

Now, select your preferred Shipping Method and click continue to proceed further.

Select Payment Method as “CMS Zencart” and click on the “Continue” button.

Now, Click on the “confirm Order” button to proceed further.

Now, Select your payment type/card type. As shown in the below screenshot.

Fill the card details and billing details and click on “Pay” button.

Now, you will be redirected back to merchant’s website and you will see the success message

Extract the zipped OsCommerce Plugin, copy and paste all the contents of 'CMS_Oscommerce' folder in the root directory of OsCommerce.

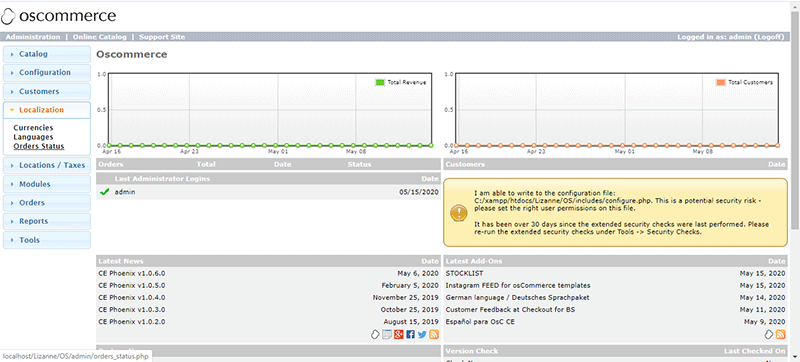
In the admin panel, Goto Localization->Orders Status
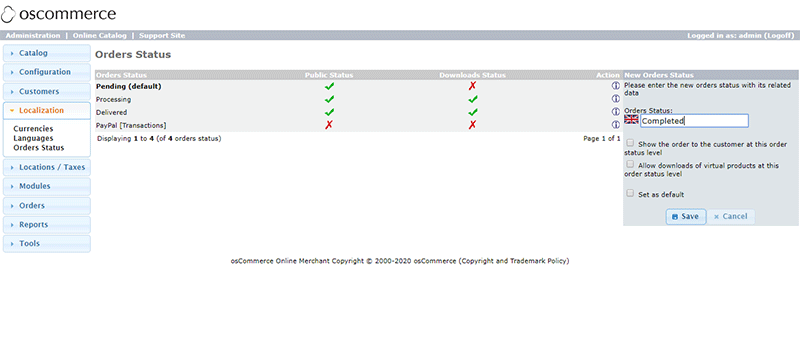
Click on Insert button; In the form, enter 'Completed' and then click on save
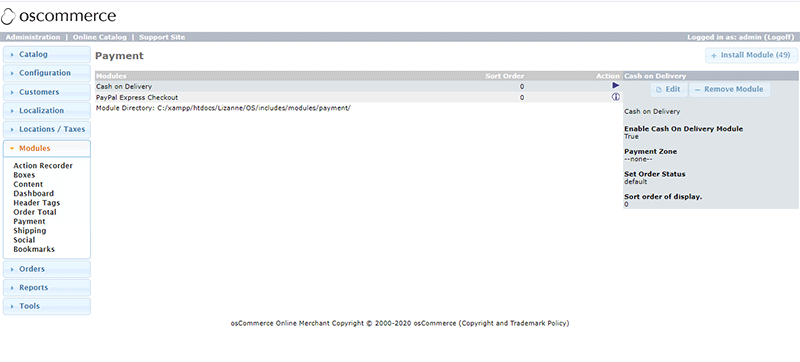
Goto Modules=>Payment; On right hand corner click on “Install Module”. See the below screenshot for your reference.
Locate [MODULE_PAYMENT_CMS_OSCOMMERCE_DESCRIPTION] and click on it. See the below screenshot for your reference.

Now, click on the “Install Module” button. See the below screenshot for your reference.

Click on the “Edit” button for configuration. See the below screenshot for your reference.

Fill the details and click on save button.

Now, go to your website [front office] and add items to your cart.
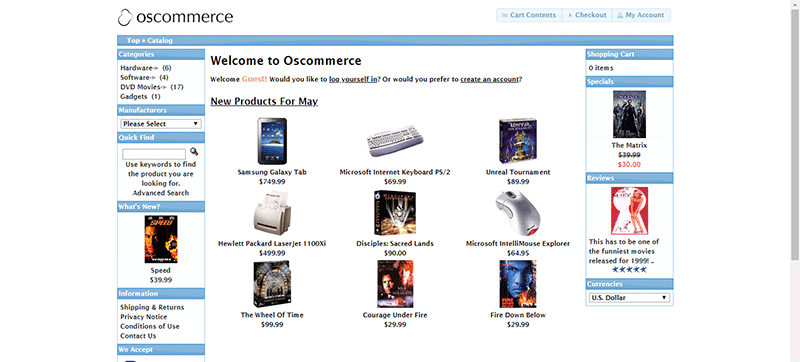
In Payment method check for “CMS OsCommerce [Pay Securely]” and click on it. See the below screenshot for your reference.
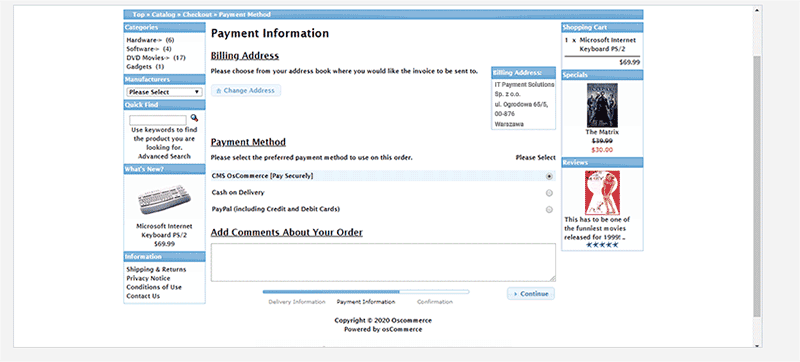
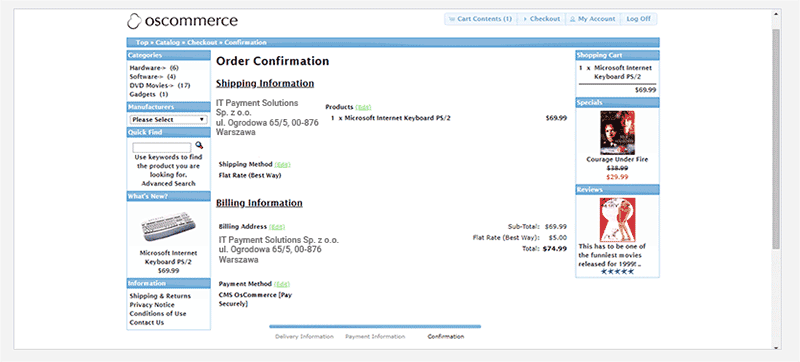
Now, click on the “Confirm Order” button to proceed to the gateway.
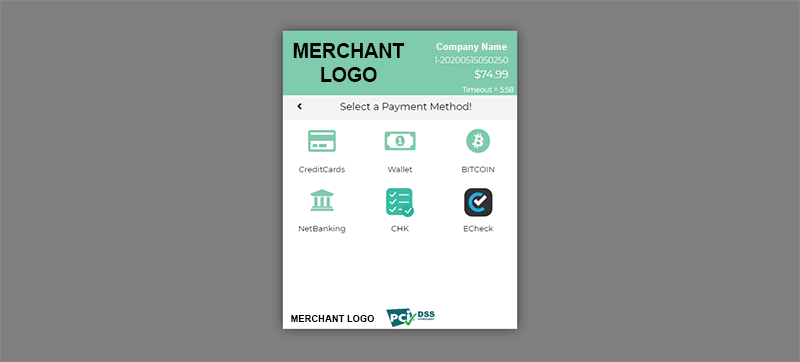
Now, you will be redirected to this page. See the below screenshot for your reference. Select your cardtype/payment type of your choice.
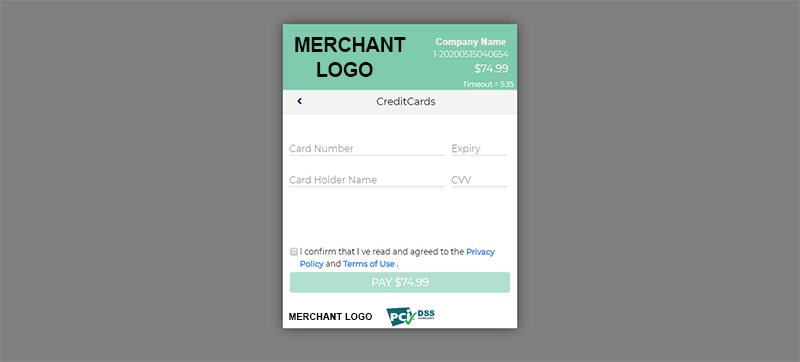
Fill all the details and click on the “PAY” button to proceed further.
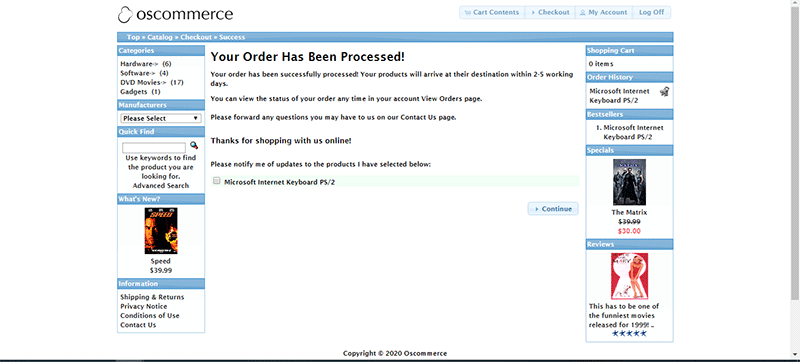
On successful transaction you will get success message. [Depending on the transaction you will get message accordingly].
- Please login into Joomla admin panel, you will see page similar like below.

- Click on the “Extensions=>Manage=>install” button.

- Go to "Upload Package File" and browse the zipped "cms_joomla" gateway file.

- Go to Extensions=>plugins and enable the "VM-Payment, Cms".

- Goto VirtueMart->Configuration->Order Statuses on left as shown in the figure and click on "new" button

- Set Order Status Name as "Failed" and Order Status Code as "L" and fill the other details and click on "save" button

- Go to VirtueMart=>Payment Methods.

- Click on the "New" button to add the "" gateway.

- Select "Payment Method Information" tab to fill all the details make sure you have selected "VM – Payment, Cms" and Select Published as "Yes".

- Now, select "configuration" and fill the details provided to you by gateway.

- Now go to your front end [website] to check the payment method as "". Now select the product as shown in the screenshot.

- Add the product to the cart

- Click on the "Show Cart"

- Now, You can see the "Payment Methods", Select the "" method and click on the check out now.

- Please fill your credential here and proceed.

- Click on the "Confirm Purchase" button to proceed further

- Now you will get the redirecting message as shown in the below screenshot.

- Select your Payment type / Card type and fill the credential and click on the "Pay now" button to proceed further.

- Depending upon your transaction you will get Success / Failed message. As we get Success message here.

provides a range of ready plugins for third party integration.